DIGIT Core
PlatformDomainsAcademyDesign SystemFeedback
2.9-LTS
2.9-LTS
  • 🖥️Platform
    • Overview
    • Why DIGIT?
    • Principles
    • Architecture
      • Service Architecture
      • Technology Architecture
        • Open Source Tools
      • Infrastructure Architecture
      • Deployment Architecture
    • API Specifications
      • Access Control
      • Boundary
      • Document Uploader
      • Encryption
      • File Store
      • ID Generation
      • Indexer
      • Localisation
      • Master Data Management
      • OTP
      • Payment Gateway
      • PDF Generation
      • URL Shortner
      • WhatsApp Chatbot
      • Workflow
    • Core Services
      • Access Control Services
      • Audit Service
        • Signed Audit Performance Testing Results
      • API Gateway
        • Configuring Gateway Rate Limiting
      • Boundary Service
        • Migrate Old Boundary Data - Steps
      • Email Notification Service
      • Encryption Service
        • Encryption Client Library
        • User Data Security Architecture
        • Guidelines for supporting User Privacy in a module
      • FileStore Service
      • ID Generation Service
      • Indexer Service
        • Indexer Configuration
      • Internal Gateway
      • Location
      • Localization Service
        • Configuring Localization
          • Setup Base Product Localisation
          • Configure SMS and Email
      • MDMS V2 (Master Data Management Service)
        • Adopt New MDMS - Steps
        • MDMS (Master Data Management Service)
          • Setting up Master Data
            • MDMS Overview
            • MDMS Rewritten
            • Configuring Tenants
            • Configuring Master Data
            • Adding New Master
            • State Level Vs City Level Master
        • MDMS Migration
      • OTP Service
      • Payment Gateway Service
      • PDF Generation Service
      • Persister Service
        • Persister Configuration
      • Service Request
      • SMS Notification Service
        • Setting Up SMS Gateway
          • Using The Generic GET & POST SMS Gateway Interface
      • User
        • User Session Management
      • User OTP Service
      • URL Shortening Service
      • Workflow
        • Setting Up Workflows
        • Configuring Workflows For An Entity
        • Workflow Auto Escalation
        • Migration To Workflow 2.0
      • Libraries
        • Tracer Library
        • Encryption Client
      • Accelerators
        • Inbox Service
    • DIGIT: How-Tos
      • SMS Template Approval Process
      • Notification Enhancement Based On Different Channel
    • Releases
      • DIGIT 2.9 LTS
        • Test Automation
        • Release Checklist
        • Service Build Updates
          • Hotfix
        • Test Cases
        • Automated DIGIT Deployment
        • Upgrade Guide: Transitioning DIGIT Modules to Spring Boot Version 3.2.2
        • Postgres Upgrade: Service Code Changes
        • Updating RDS Version in AWS
        • LTS DIGIT Migration - v2.8 To v2.9
        • Changelog
        • Backup PostgreSQL Database In AWS - Steps
    • Source Code
  • 📓Guides
    • Installation Guide
      • Infrastructure Setup
        • AWS
          • 1. Pre-requisites
          • 2. Setup AWS Account
          • 3. Provision Infrastructure
          • FAQ
        • Azure
          • 1. Azure Pre-requisites
          • 2. Understanding AKS
          • 3. Infra-as-code (Terraform)
        • SDC
          • 1. SDC Pre-requisites
          • 2. Infra-as-code (Kubespray)
          • CI/CD Setup On SDC
        • CI/CD Set Up
          • CI/CD Build Job Pipeline Setup
      • DIGIT Deployment
        • Full Deployment
          • Deploy DIGIT
            • Prepare Deployment Configuration
        • Full Deployment (Beta)
          • Creating New HelmChart
          • Prepare Helm Release Chart
      • Quick Setup (AWS)
    • Data Setup Guide
      • Bootstrap DIGIT
      • Productionize DIGIT
      • User Module
      • Localisation Module
      • Location Module
      • MDMS - V2
    • Design Guide
      • Model Requirements
      • Design Services
      • Design User Interface
      • Checklists
    • Developer Guide
      • Pre-requisites Training Resources
      • Backend Developer Guide
        • Section 0: Prep
          • Development Pre-requisites
          • Design Inputs
            • High Level Design
            • Low Level Design
          • Development Environment Setup
        • Section 1: Create Project
          • Generate Project Using API Specs
          • Create Database
          • Configure Application Properties
          • Import Core Models
          • Implement Repository Layer
          • Create Validation & Enrichment Layers
          • Implement Service Layer
          • Build The Web Layer
        • Section 2: Integrate Persister & Kafka
          • Add Kafka Configuration
          • Implement Kafka Producer & Consumer
          • Add Persister Configuration
          • Enable Signed Audit
        • Section 3: Integrate Microservices
          • Integrate IDGen Service
          • Integrate User Service
          • Add MDMS Configuration
          • Integrate MDMS Service
          • Add Workflow Configuration
          • Integrate Workflow Service
          • Integrate URL Shortener Service
        • Section 4: Integrate Billing & Payment
          • Custom Calculator Service
          • Integrate Calculator Service
          • Payment Back Update
        • Section 5: Other Advanced Integrations
          • Add Indexer Configuration
          • Certificate Generation
        • Section 6: Run Final Application
        • Section 7: Build & Deploy Instructions
        • FAQs
      • UI Developer Guide
        • DIGIT-UI
          • UI Components Standardisation
            • DIGIT UI Core React Components
            • DIGIT UI Core Flutter Components
              • Input Field
              • Radio
              • Toggle
              • Button
              • Dropdown
              • Checkbox
              • Toast
              • Info Card
            • DIGIT UI Components v0.2.0
              • Foundation
                • Typography
                • Colour Pallete
                • Spacer
              • Atom
                • Accordion
                • Button
                • Checkbox
        • DIGIT UI Development Pre-requisites
        • UI Configuration (DevOps)
        • Local Development Setup
        • Run Application
        • Build & Deploy
        • Pre-defined Screens In DIGIT-UI
          • Create Screen (FormComposer)
          • Inbox/Search Screen
          • Workflow Component
        • Create a New UI Module/Package
          • Project Structure
          • Install Dependency
          • Module.js
          • Import Required Components
          • Common Hooks
        • Employee Module Setup
          • Write Employee Module Code
          • Create Form - Create Screen
        • Citizen Module Setup
          • Sample screenshots
          • Citizen Landing Screen
          • Write Citizen Module Code
        • Customisation
          • Integrate External Web Application/UI With DIGIT UI
          • Utility - Pre-Process MDMS Configuration
          • CSS Customisation
          • Kibana Dashboard Integration With DSS Module
          • Login Page
        • Setup Monitoring Tools
        • Android Web View & How To Generate APK
        • FAQs
          • Troubleshoot Using Browser Network Tab
          • Debug Android App Using Chrome Browser
      • Flutter (Mobile App) UI Developer Guide
        • Introduction to Flutter
          • Flutter - Key Features
          • Flutter Architecture & Approach
          • Flutter Pre-Requisites
        • Setup Development Environment
          • Flutter Installation & Setup Guide
          • Setup Device Emulators/Simulators
          • Run Application
        • Build User Interfaces
          • Create Form Screen
        • Build Deploy & Publish
          • Build & Deploy Flutter Web Application
          • Generate Android APKs & App Bundles
          • Publishing App Bundle To Play Store
        • State Management With Provider & Bloc
          • Provider State Management
          • BloC State Management
        • Best Practices & Tips
        • Troubleshooting
    • Operations Guide
      • DIGIT - Infra Overview
      • Kubernetes
        • RBAC Management
        • Database Dump - Playground
      • Setup Jenkins - Docker way
      • GitOps
        • Git Client installation
        • GitHub organization creation
        • Adding new SSH key to it
        • GitHub repo creation
        • GitHub Team creation
        • Enabling Branch protection:
        • CODEOWNER Reviewers
        • Adding Users to the Git
        • Setting up an OAuth with GitHub
        • Fork (Fork the mdms,config repo with a tenant-specific branch)
      • Working with Kubernetes
        • Installation of Kubectl
      • Containerizing application using Docker
        • Creation of Dockerhub account
      • Infra Provisioning Using Terraform
        • Installation of Terraform
      • Customise Existing Terraform Templates
      • Cert-Manager
        • Obtaining SSL certificates with the help of cluster-issuer
      • Moving Docker Images
      • Pre and post deployment checklist
      • Multi-tenancy Setup
      • Availability
        • Infrastructure
        • Backbone services
          • Database
          • Kafka
          • Kafka Connect
          • Elastic search
            • Elastic Search Rolling Upgrade
            • ElasticSearch Direct Upgrade
        • Core services
        • DIGIT apps
        • DSS dashboard
      • Observability
        • ES-Curator - Clear Old Logs/indices
        • Monitoring
        • Environment Changes
        • Tracing
        • Jaeger Tracing Setup
        • Logging
        • eGov Monitoring & Alerting Setup
        • eGov Logging Setup
      • Performance
        • What to monitor?
          • Infrastructure
          • Backbone services
          • Core services
        • Identifying bottlenecks
        • Solutions
      • Handling errors
      • Security
      • Reliability and disaster recovery
      • Privacy
      • Skillsets/hiring
      • Incident management processes
      • Kafka Troubleshooting Guide
        • How to clean up Kafka logs
        • How to change or reset consumer offset in Kafka?
      • SRE Rituals
      • FAQs
        • I am unable to login to the citizen or employee portal. The UI shows a spinner.
        • My DSS dashboard is not reflecting accurate numbers? What can I do?
      • Deployment using helm
        • Helm Installation
        • Helm chart creation
        • Helm chart customization
      • How to Dump Elasticsearch Indexes
      • Deploy Nginx-Ingress-Controller
      • Deployment Job Pipeline Setup
      • OAuth2-Proxy Setup
      • Jira Ticket Creation
    • Implementation Guide
    • Security & Privacy Guide
      • Security & Privacy Guidelines For Product Developers
      • Security & Privacy Guidelines For Solution Implementing Agencies
      • Security & Privacy Guidelines For Program Owners
  • 🚀Accelerators
    • UI Frameworks
      • Service Build Updates
    • Integrations
      • Payment
      • Notification
      • Transaction
      • Verification
      • View
      • Calculation
    • Concepts
      • Deployment - Key Concepts
        • Security Practices
        • Readiness & Liveness
        • Resource Requests & Limits
        • Deploying DIGIT Services
        • Deployment Architecture
        • Routing Traffic
        • Backbone Deployment
    • API Playground
    • Sandbox
    • Checklists
      • API Checklist
      • Security Checklist
        • Security Guidelines Handbook
        • Security Flow - Exemplar
      • Performance Checklist
      • Deployment Checklist
    • Contribute
    • Discussion Board
    • Academy
    • Events
Powered by GitBook

All content on this page by eGov Foundation is licensed under a Creative Commons Attribution 4.0 International License.

On this page
  • Installing Jenkins the Docker Way
  • Tools and Versions used
  • Prerequisites:
  • Step 1: Install a Docker on the Host you provisioned for Jenkins & Connect to the Host via SSH
  • Step 2: Install the Job DSL Plugin
  • Step 3: Create Job DSL Jenkins Project
  • Step 4: Configure Job DSL Project
  • Step 5: Prepare Maven Usage
  • Step 6: Prepare Git Usage
  • Step 7: Create Jenkins Job from Code
  • Step 7.1 Build Project
  • Step 7.2 (optional): Check Console Output
  • Step 7.3: Review automatically built Project
  • Appendix A: Solve Git Problem: „tell me who you are“
  • Symptoms: Git Error: status code 128
  • Resolution:
  • Appendix B: Maven Error: Cannot run program „mvn“
  • Symptoms:
  • Appendix C: Updating Jenkins
  • Appendix D: Job DSL Syntax
  • Summary

Was this helpful?

  1. Guides
  2. Operations Guide

Setup Jenkins - Docker way

Jenkins for Build, Test and Deployment Automation

While we are adopting the Microservices architecture, it also demands to have an efficient CI/CD tools like jenkins. Along the cloud-native application developement and deployment jenkins can also be run cloud-native.

Since all processes, including software build, test and deployment, are performed every two or four weeks, this is an ideal playground for automation tools like Jenkins: After the developer commits a code change to the repository, Jenkins will detect this change and will trigger the build and test process. So Let's setup Jenkins as a docker container. Step-by-step.

Installing Jenkins the Docker Way

Tools and Versions used

  • VM or C2 Instance or a Standalone on-premisis machin

  • Docker 1.12.1

  • Jenkins 2.32.2

  • Job DSL Plugin 1.58

Prerequisites:

  • Ubuntu or an Liniux Machine

  • Free RAM for the a VM/Machine >~ 4 GB.

  • Docker Host is available.

  • Tested with 3 vCPU (2 vCPU might work as well).

Step 1: Install a Docker on the Host you provisioned for Jenkins & Connect to the Host via SSH

If you are using a host that already has docker installed, you can skip this step. Make sure that your host has enough memory.

Installing Docker on Windows and Mac can be a real challenge, but possible: here we will see an efficient way by using a Linux machine.

Prerequisites of this step:

  • I recommend having direct access to the Internet: via Firewall, but without HTTP proxy.

  • Administration rights on your computer.

Step 2: Download Jenkins Image

This extra download step is optional since the Docker image will be downloaded automatically in step 3 if it is not already found on the system:

(dockerhost)$ sudo docker pull jenkins
Using default tag: latest
latest: Pulling from library/jenkins
Digest: sha256:8820149b54bfc5d05146b82150b5fdab583eef3e0499fb4ed630f77647a42942
Status: Image is up to date for jenkins:latest

The version of the downloaded Jenkins image can be checked with the following command:

(dockerhost)$ sudo docker run -it --rm jenkins --version
2.19.3

We are using version 2.9.13 currently. If you want to make sure that you use the exact same version as I have used in this blog, you can use the imagename jenkins:2.19.3 in all docker commands instead of jenkins only.

Step 3: Start Jenkins in interactive Terminal Mode

In this step, we will run Jenkins interactively (with -it switch instead of -d switch) to better see, what is happening. But first, we check that the port we will use is free:

(dockerhost)$ sudo docker ps
CONTAINER ID        IMAGE                    COMMAND                  CREATED             STATUS              PORTS                                            NAMES
0ec82b4ca2fd        google/cadvisor:latest   "/usr/bin/cadvisor -l"   2 days ago          Up 2 days           0.0.0.0:8080->8080/tcp                           cadvisor
...

Since we see that one of the standard ports of Jenkins (8080, 50000) is already occupied and I do not want to confuse the readers of this blog post by mapping the port to another host port, I just stop the cadvisor container for this „hello world“:

(dockerhost)$ sudo docker stop cadvisor
cadvisor

Jenkins will be in need of a persistent storage. For that, we create a new folder on the Docker host:

(dockerhost)$ mkdir jenkins_home; cd jenkins_home

We start the Jenkins container with the jenkins_home Docker host volume mapped to /var/jenkins_home:

(dockerhost)$ sudo docker run -it --rm --name jenkins -p8080:8080 -p50000:50000 -v`pwd`:/var/jenkins_home jenkins
Running from: /usr/share/jenkins/jenkins.war
webroot: EnvVars.masterEnvVars.get("JENKINS_HOME")
Nov 30, 2016 6:12:14 PM Main deleteWinstoneTempContents
WARNING: Failed to delete the temporary Winstone file /tmp/winstone/jenkins.war
Nov 30, 2016 6:12:14 PM org.eclipse.jetty.util.log.JavaUtilLog info
INFO: Logging initialized @347ms
Nov 30, 2016 6:12:14 PM winstone.Logger logInternal
INFO: Beginning extraction from war file
Nov 30, 2016 6:12:14 PM org.eclipse.jetty.util.log.JavaUtilLog warn
WARNING: Empty contextPath
Nov 30, 2016 6:12:14 PM org.eclipse.jetty.util.log.JavaUtilLog info
INFO: jetty-9.2.z-SNAPSHOT
Nov 30, 2016 6:12:16 PM org.eclipse.jetty.util.log.JavaUtilLog info
INFO: NO JSP Support for /, did not find org.eclipse.jetty.jsp.JettyJspServlet
Jenkins home directory: /var/jenkins_home found at: EnvVars.masterEnvVars.get("JENKINS_HOME")
Nov 30, 2016 6:12:17 PM org.eclipse.jetty.util.log.JavaUtilLog info
INFO: Started w.@7674f035{/,file:/var/jenkins_home/war/,AVAILABLE}{/var/jenkins_home/war}
Nov 30, 2016 6:12:17 PM org.eclipse.jetty.util.log.JavaUtilLog info
INFO: Started ServerConnector@548d708a{HTTP/1.1}{0.0.0.0:8080}
Nov 30, 2016 6:12:17 PM org.eclipse.jetty.util.log.JavaUtilLog info
INFO: Started @3258ms
Nov 30, 2016 6:12:17 PM winstone.Logger logInternal
INFO: Winstone Servlet Engine v2.0 running: controlPort=disabled
Nov 30, 2016 6:12:17 PM jenkins.InitReactorRunner$1 onAttained
INFO: Started initialization
Nov 30, 2016 6:12:17 PM jenkins.InitReactorRunner$1 onAttained
INFO: Listed all plugins
Nov 30, 2016 6:12:19 PM jenkins.InitReactorRunner$1 onAttained
INFO: Prepared all plugins
Nov 30, 2016 6:12:19 PM jenkins.InitReactorRunner$1 onAttained
INFO: Started all plugins
Nov 30, 2016 6:12:19 PM jenkins.InitReactorRunner$1 onAttained
INFO: Augmented all extensions
Nov 30, 2016 6:12:20 PM jenkins.InitReactorRunner$1 onAttained
INFO: Loaded all jobs
Nov 30, 2016 6:12:20 PM hudson.model.AsyncPeriodicWork$1 run
INFO: Started Download metadata
Nov 30, 2016 6:12:20 PM hudson.model.AsyncPeriodicWork$1 run
INFO: Finished Download metadata. 97 ms
Nov 30, 2016 6:12:20 PM org.jenkinsci.main.modules.sshd.SSHD start
INFO: Started SSHD at port 44955
Nov 30, 2016 6:12:21 PM jenkins.util.groovy.GroovyHookScript execute
INFO: Executing /var/jenkins_home/init.groovy.d/tcp-slave-agent-port.groovy
Nov 30, 2016 6:12:22 PM jenkins.InitReactorRunner$1 onAttained
INFO: Completed initialization
Nov 30, 2016 6:12:22 PM org.springframework.context.support.AbstractApplicationContext prepareRefresh
INFO: Refreshing org.springframework.web.context.support.StaticWebApplicationContext@453fc3cf: display name [Root WebApplicationContext]; startup date [Wed Nov 30 18:12:22 UTC 2016]; root of context hierarchy
Nov 30, 2016 6:12:22 PM org.springframework.context.support.AbstractApplicationContext obtainFreshBeanFactory
INFO: Bean factory for application context [org.springframework.web.context.support.StaticWebApplicationContext@453fc3cf]: org.springframework.beans.factory.support.DefaultListableBeanFactory@79a53f4b
Nov 30, 2016 6:12:22 PM org.springframework.beans.factory.support.DefaultListableBeanFactory preInstantiateSingletons
INFO: Pre-instantiating singletons in org.springframework.beans.factory.support.DefaultListableBeanFactory@79a53f4b: defining beans [authenticationManager]; root of factory hierarchy
Nov 30, 2016 6:12:22 PM org.springframework.context.support.AbstractApplicationContext prepareRefresh
INFO: Refreshing org.springframework.web.context.support.StaticWebApplicationContext@7ea44b7: display name [Root WebApplicationContext]; startup date [Wed Nov 30 18:12:22 UTC 2016]; root of context hierarchy
Nov 30, 2016 6:12:22 PM org.springframework.context.support.AbstractApplicationContext obtainFreshBeanFactory
INFO: Bean factory for application context [org.springframework.web.context.support.StaticWebApplicationContext@7ea44b7]: org.springframework.beans.factory.support.DefaultListableBeanFactory@12544046
Nov 30, 2016 6:12:22 PM org.springframework.beans.factory.support.DefaultListableBeanFactory preInstantiateSingletons
INFO: Pre-instantiating singletons in org.springframework.beans.factory.support.DefaultListableBeanFactory@12544046: defining beans [filter,legacy]; root of factory hierarchy
Nov 30, 2016 6:12:22 PM jenkins.install.SetupWizard init
INFO:

*************************************************************
*************************************************************
*************************************************************

Jenkins initial setup is required. An admin user has been created and a password generated.
Please use the following password to proceed to installation:

0c4a8413a47943ac935a4902e3b8167e

This may also be found at: /var/jenkins_home/secrets/initialAdminPassword

*************************************************************
*************************************************************
*************************************************************

Nov 30, 2016 6:12:27 PM hudson.model.UpdateSite updateData
INFO: Obtained the latest update center data file for UpdateSource default
Nov 30, 2016 6:12:27 PM hudson.WebAppMain$3 run
INFO: Jenkins is fully up and running
--> setting agent port for jnlp
--> setting agent port for jnlp... done

Step 4: Open Jenkins in a Browser

Now we want to connect to the Jenkins portal. For that, open a browser and open the URL

<your_jenkins_host>:8080

In our case, Jenkins is running in a container and we have mapped the container-port 8080 to the local port 8080 of the Docker host. On the Docker host, we can open the URL.

localhost:8080

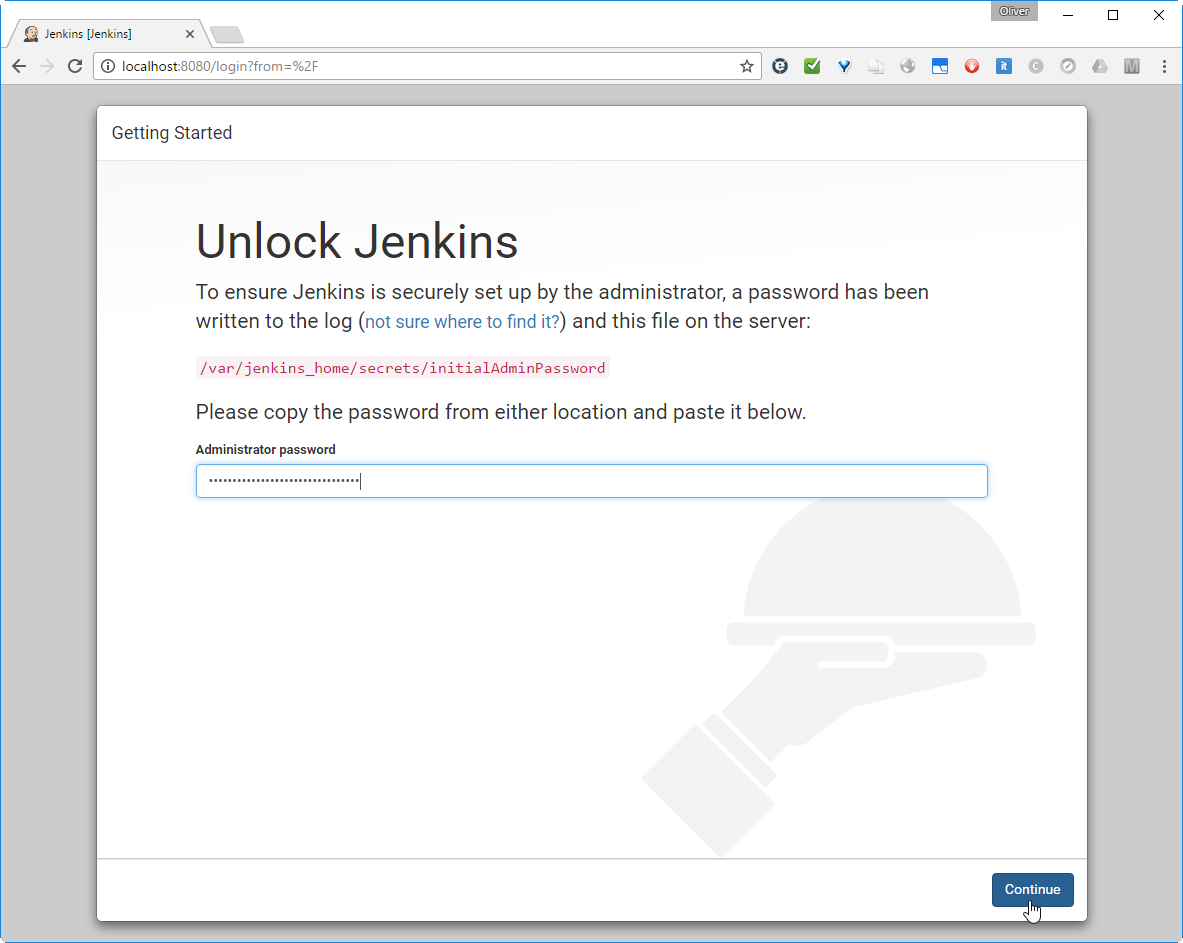
The Jenkins login screen will open:

The admin password can be retrieved from the startup log, we have seen above (0c4a8413a47943ac935a4902e3b8167e), or we can find it by typing

(dockerhost: .../jenkins_home)$ cat secrets/initialAdminPassword
0c4a8413a47943ac935a4902e3b8167e

on the mapped jenkins_home folder on the Docker host.

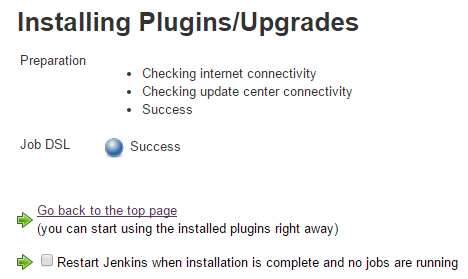
Step 5: Install Plugins

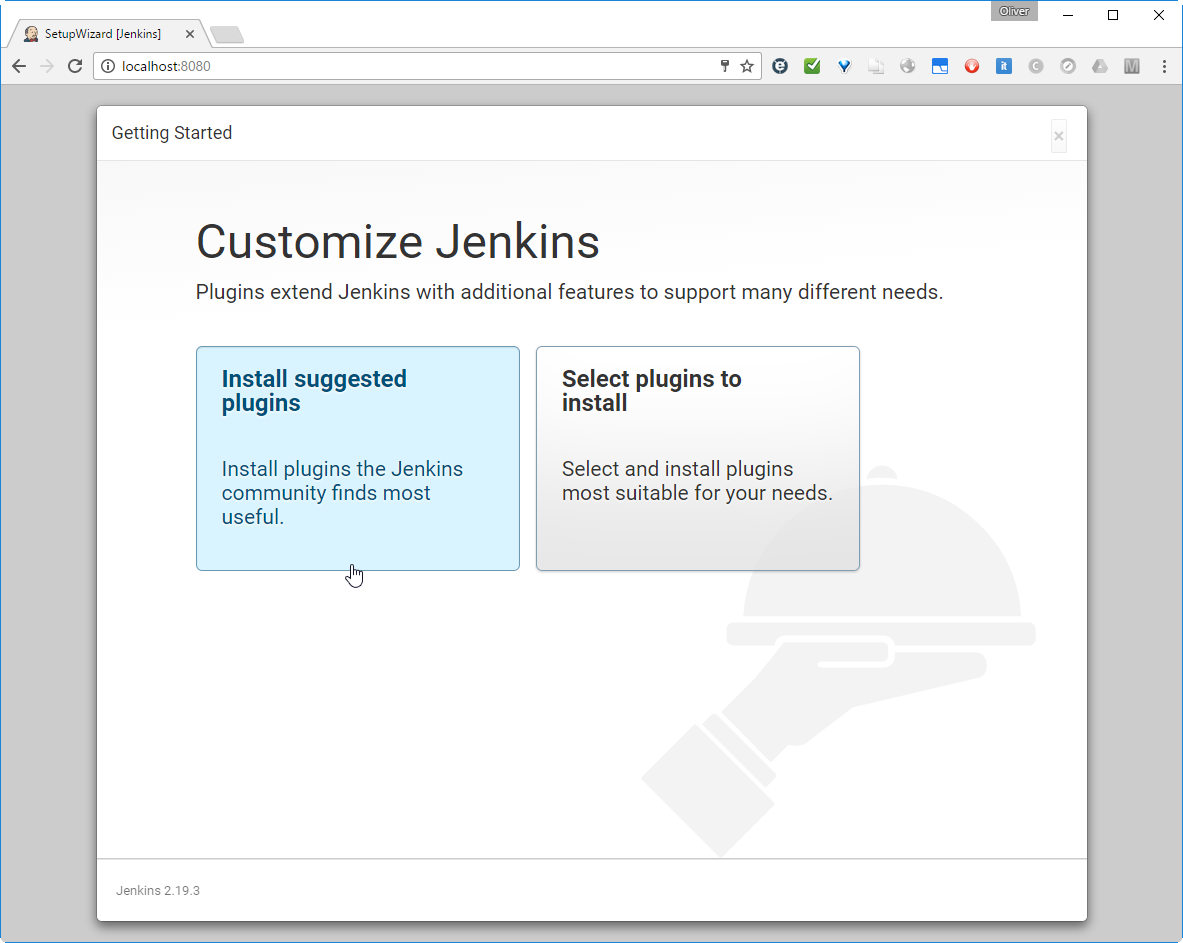
Let us install the suggested plugins:
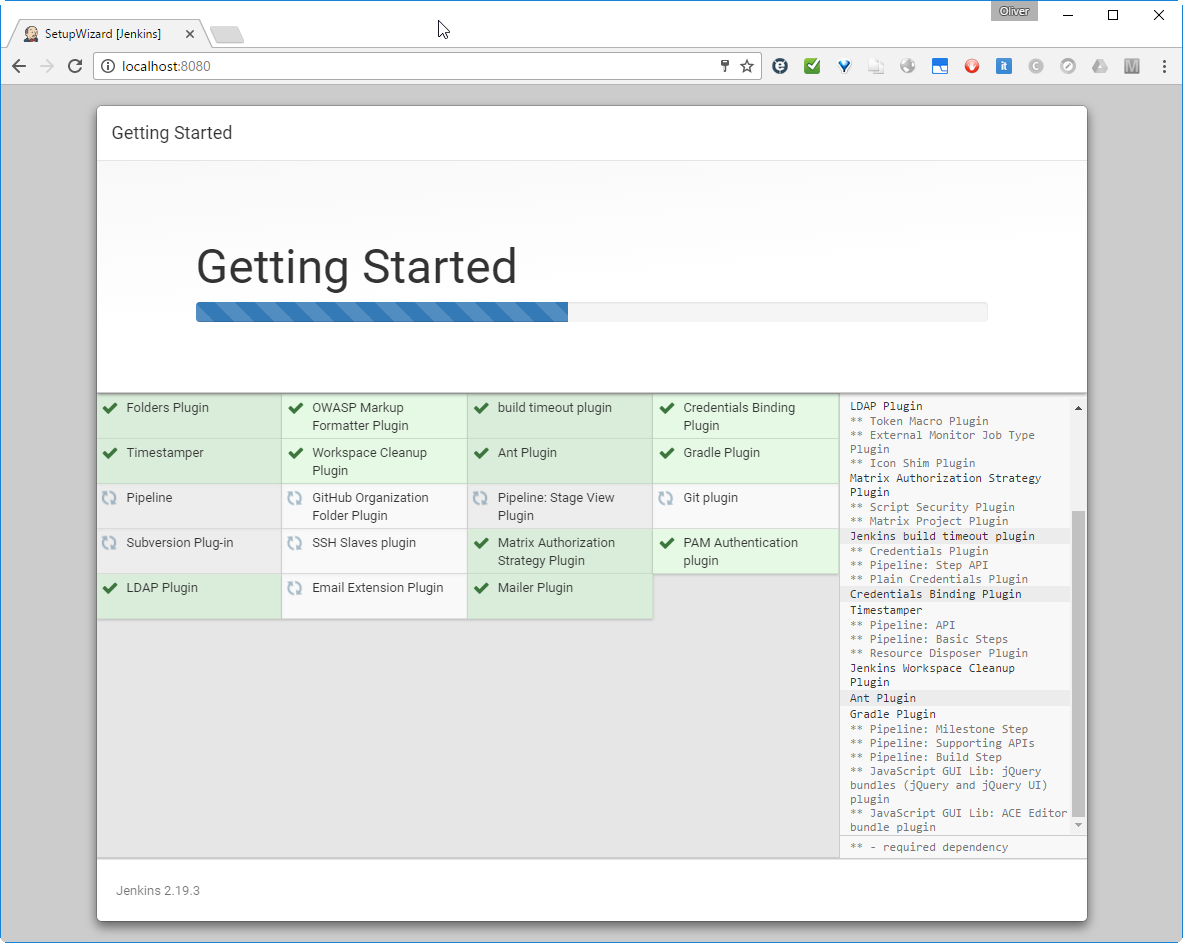
This may take a while to finish:
Step 6: Create an Admin User and log in

Then we reach a page, where we can create an Admin user:
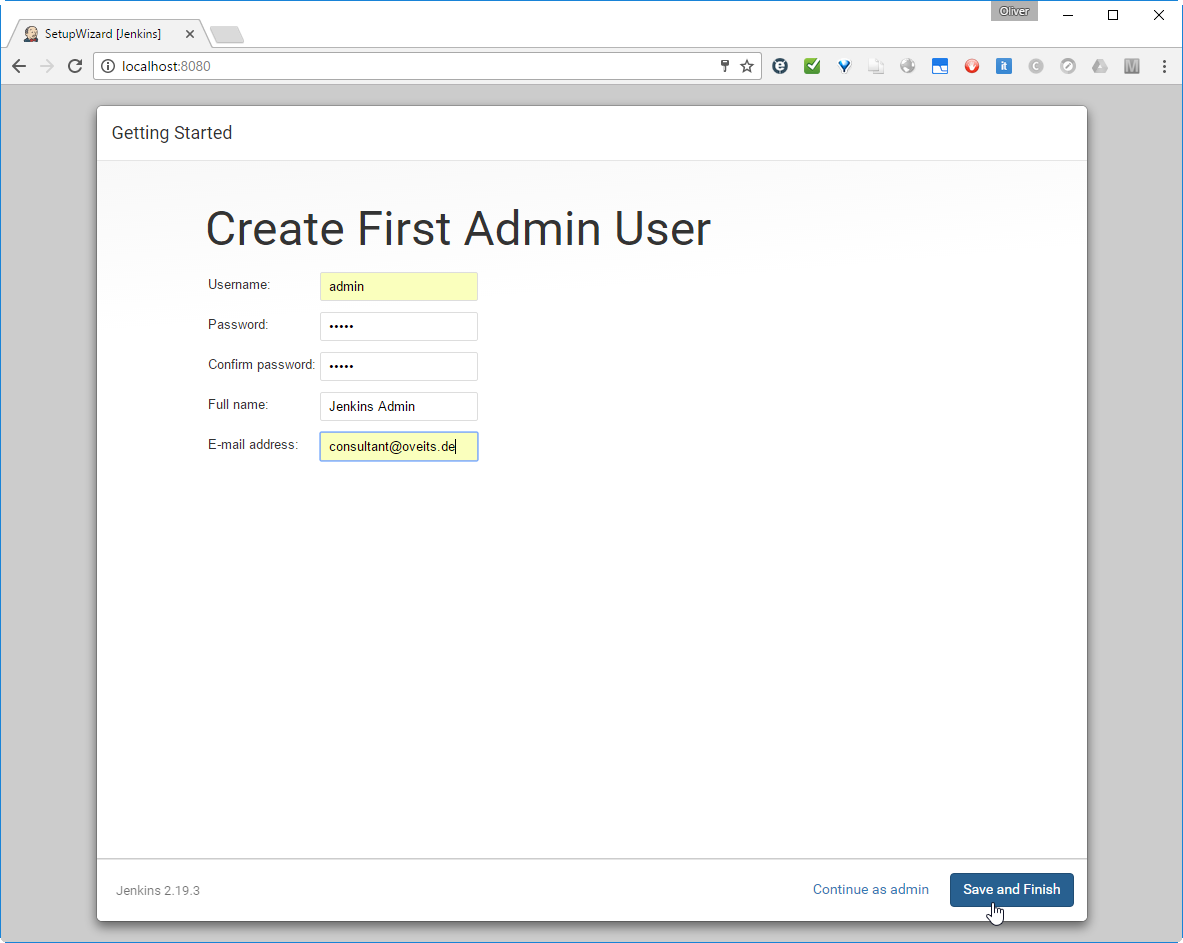
Let us do so and save and finish.
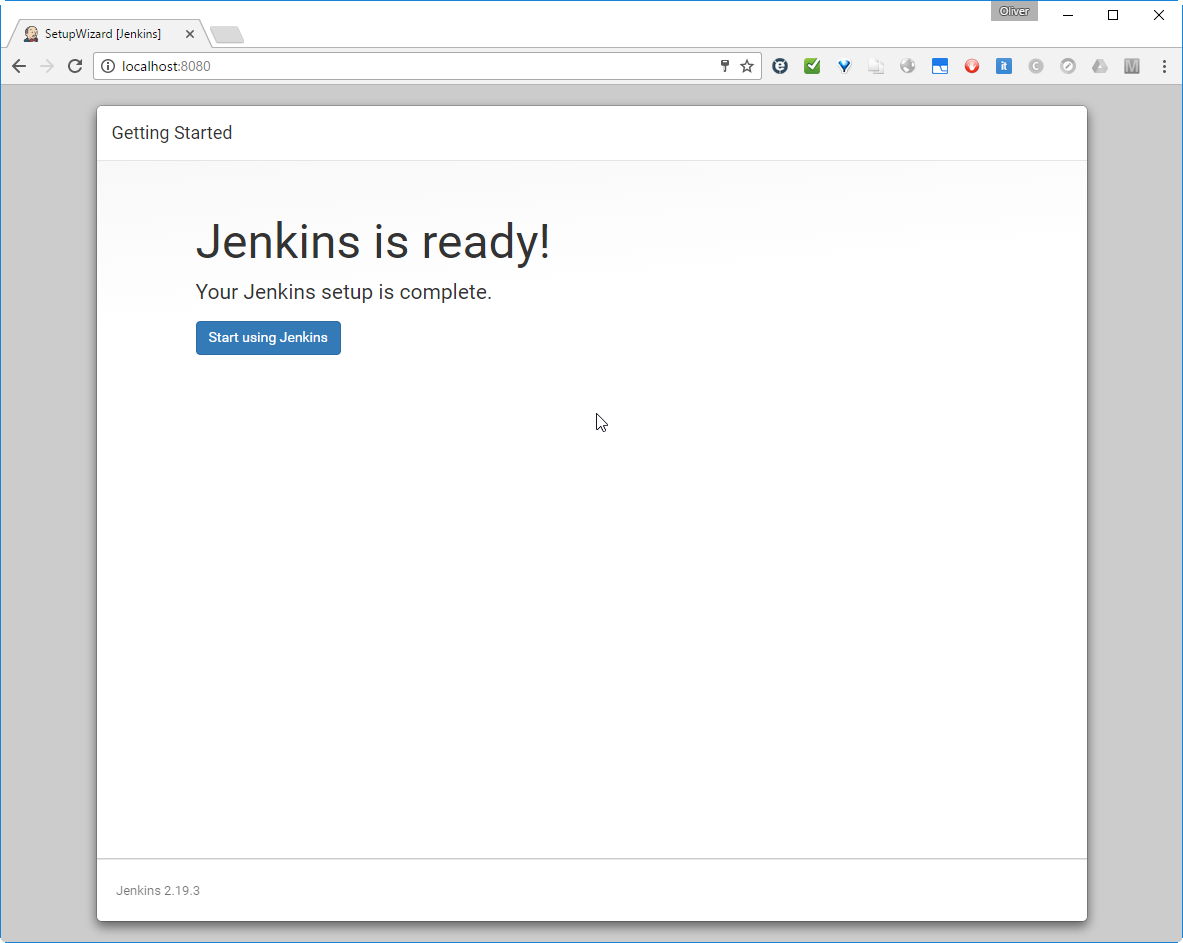
Note: After this step, I have deleted the Jenkins container and started a new container attached to the same Jenkins Home directory. After that, all configuration and plugins were still available and we can delete containers after usage without loosing relevant information.

I have had a dinner break at this point. Maybe this is the reason I got following message when clicking the „Start using Jenkins“ button?
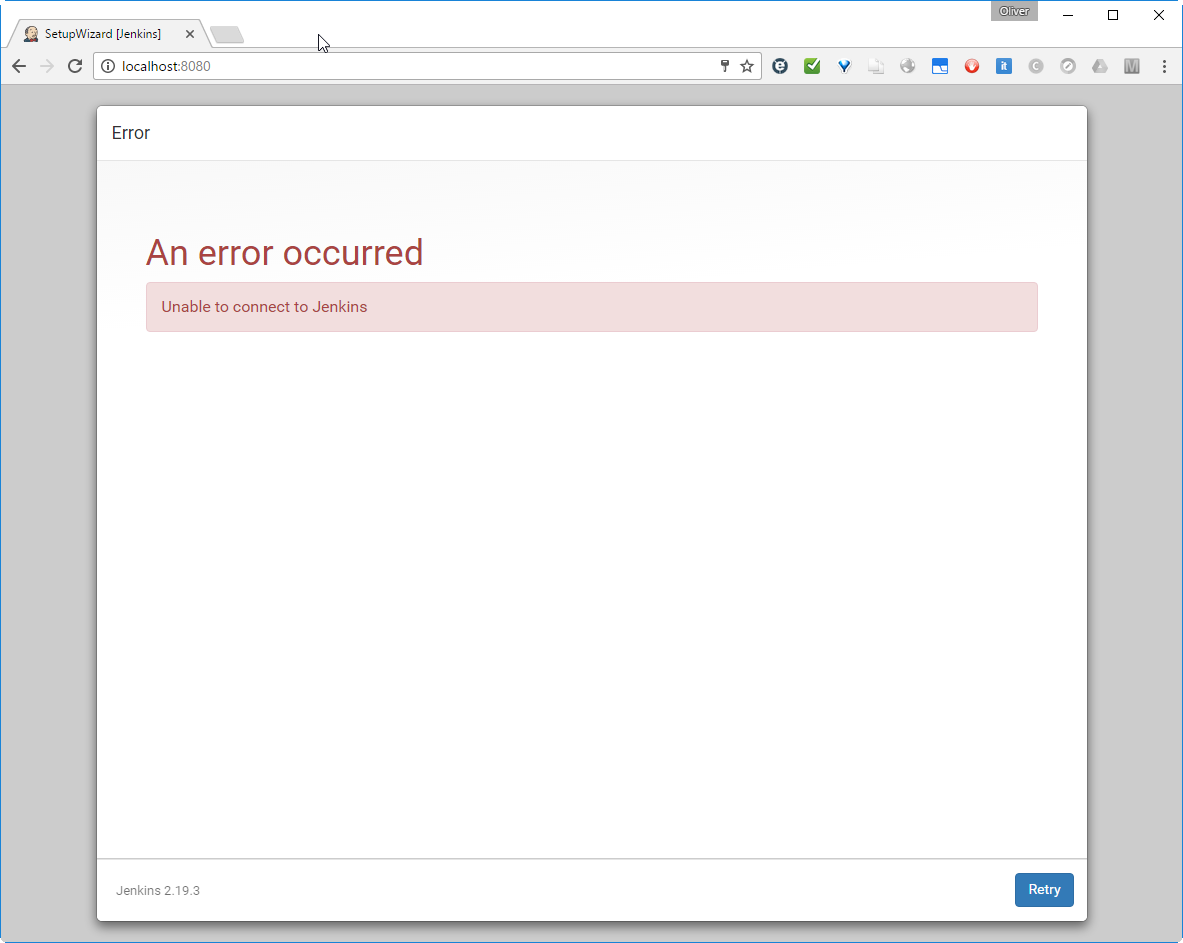
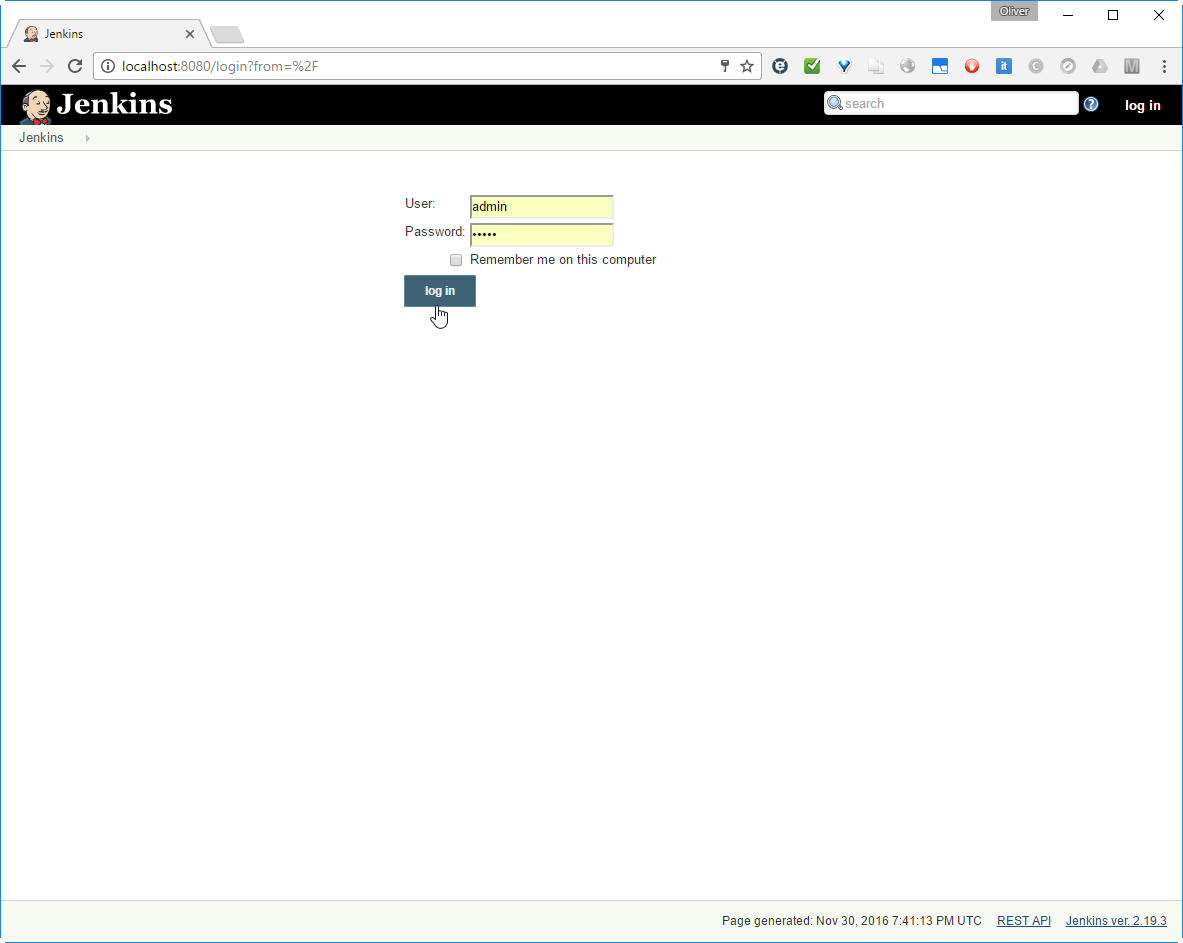
What ever. After clicking „retry“, we reach the login page:
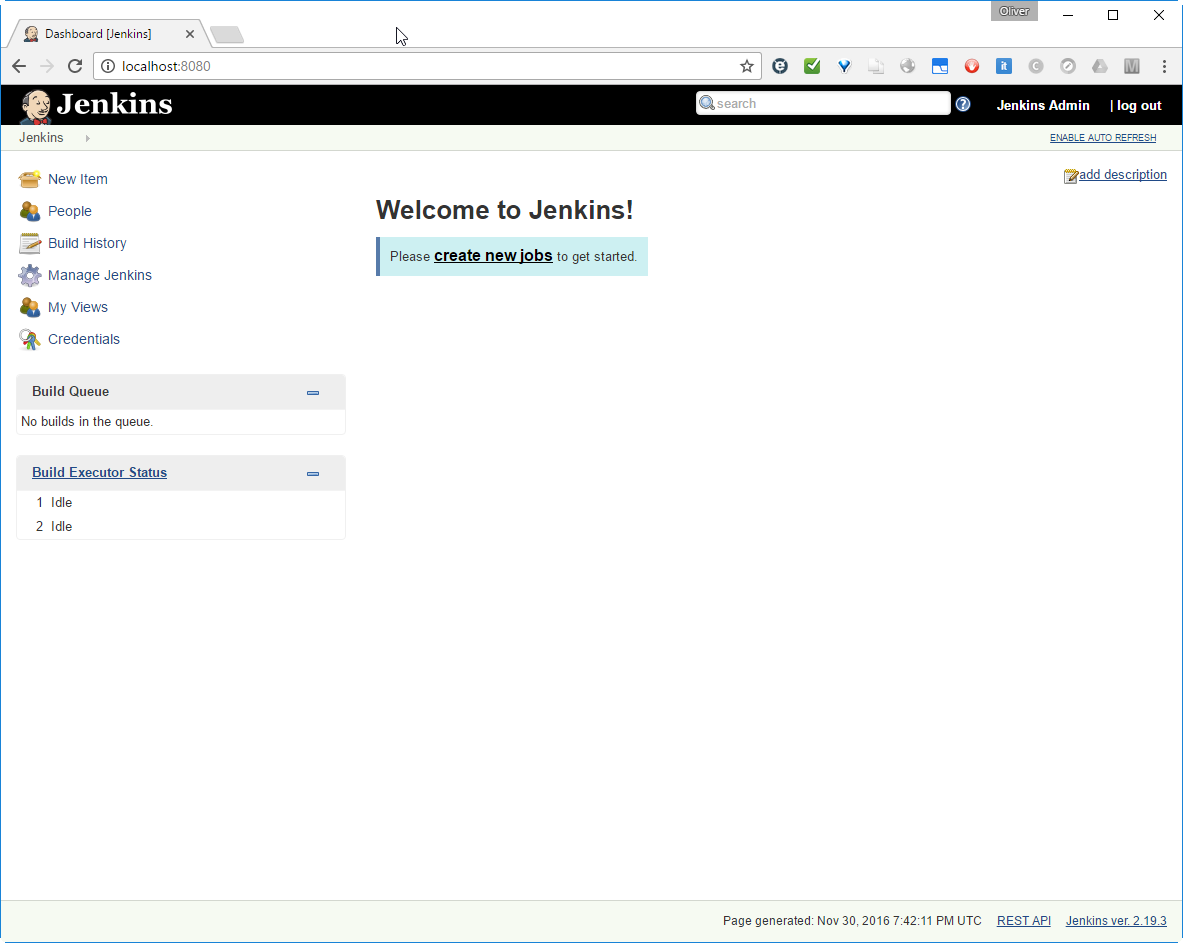
Create a New Job

In the nex, we will create our first Jenkins job. I plan to trigger the Maven and/or Gradle build of a Java executable file upon detection of a code change.
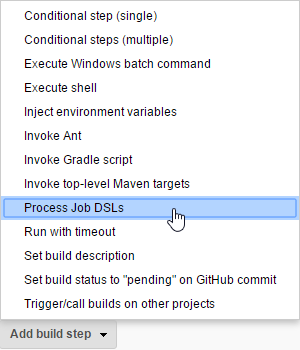
Step 2: Install the Job DSL Plugin

Step 3: Create Job DSL Jenkins Project

We create a Job DSL Job like follows:

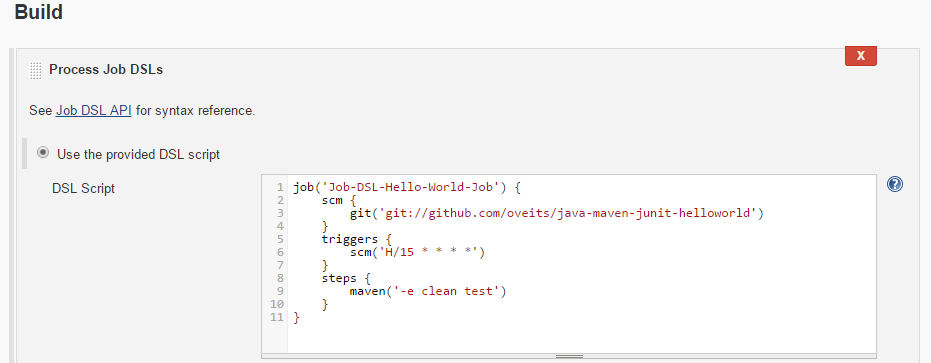
Step 4: Configure Job DSL Project

-> insert:

job('Job-DSL-Hello-World-Job') {
    scm {
        git('git://github.com/<org>/java-maven-junit-helloworld')
    }
    triggers {
        scm('H/15 * * * *')
    }
    steps {
        maven('-e clean test')
    }
}

Step 5: Prepare Maven Usage

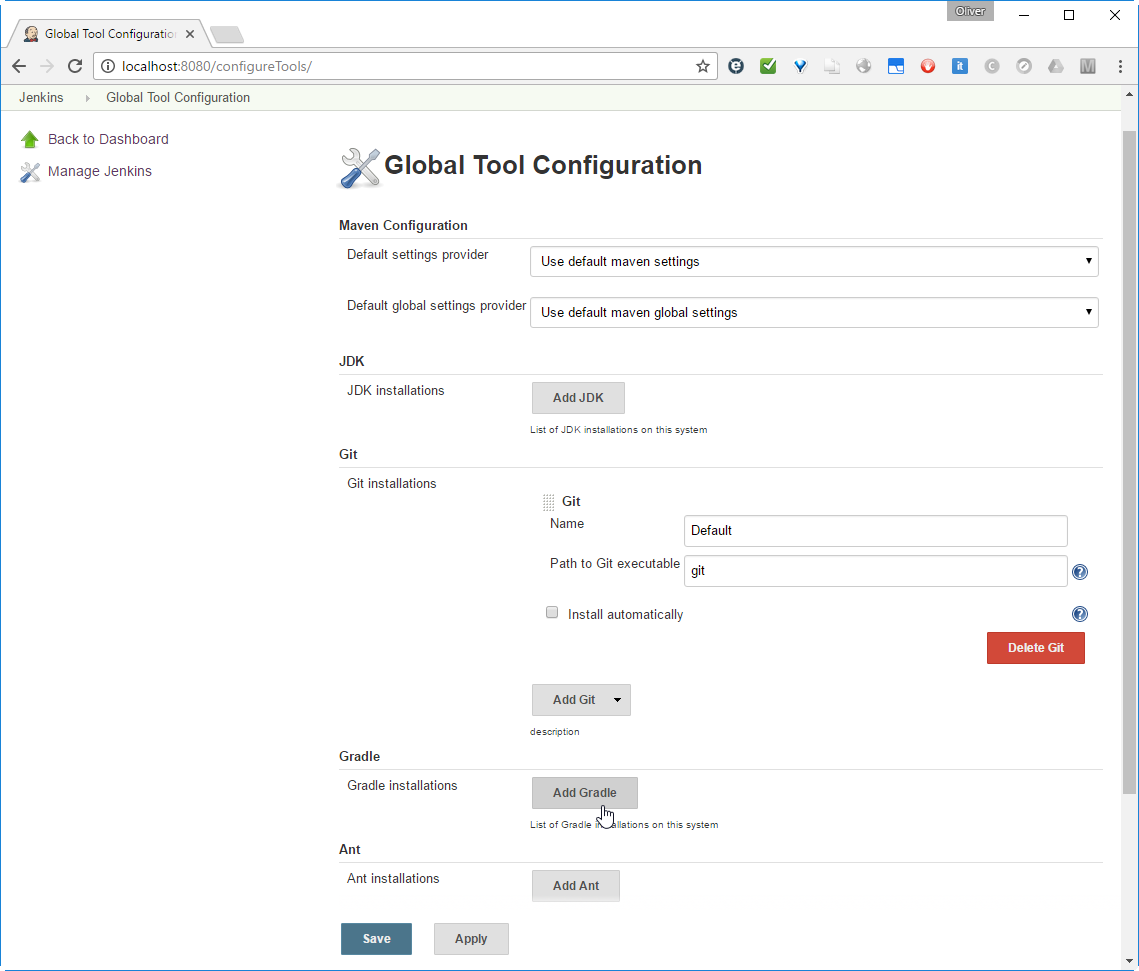
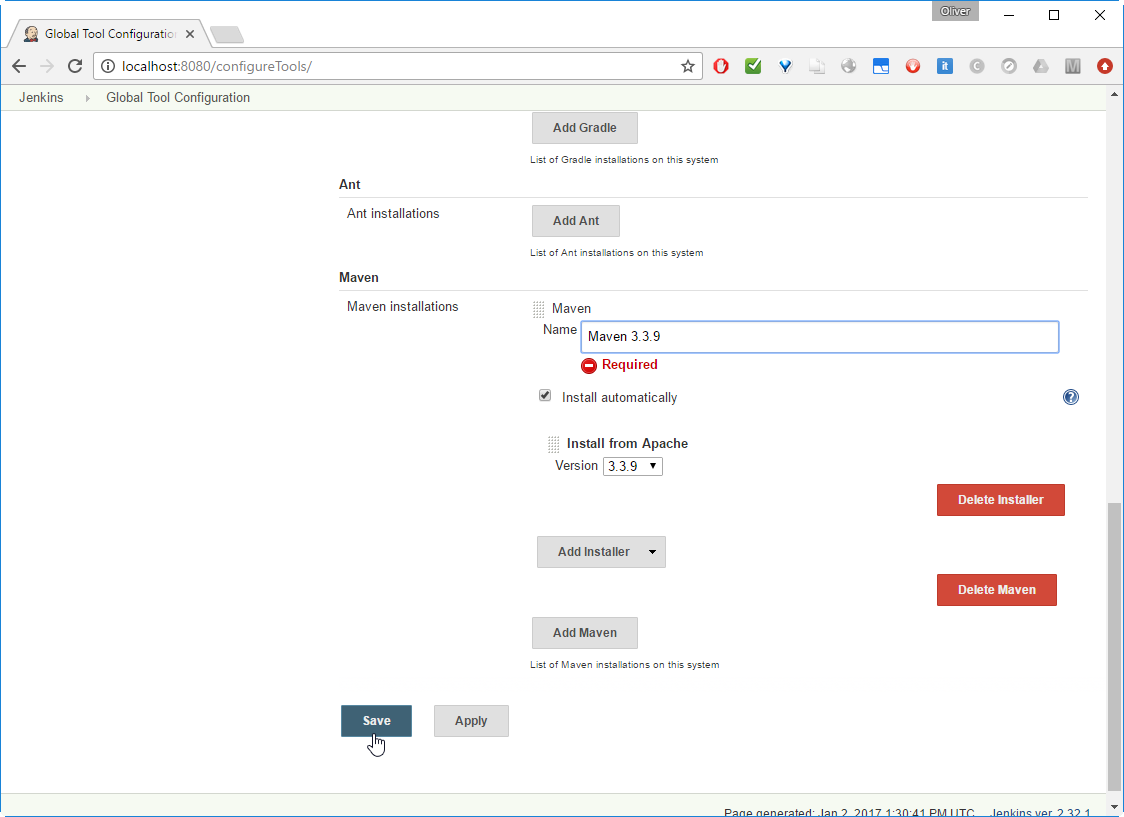
Goto Jenkins -> Manage Jenkins -> Global Tool Configuration (available for Jenkins >2.0)
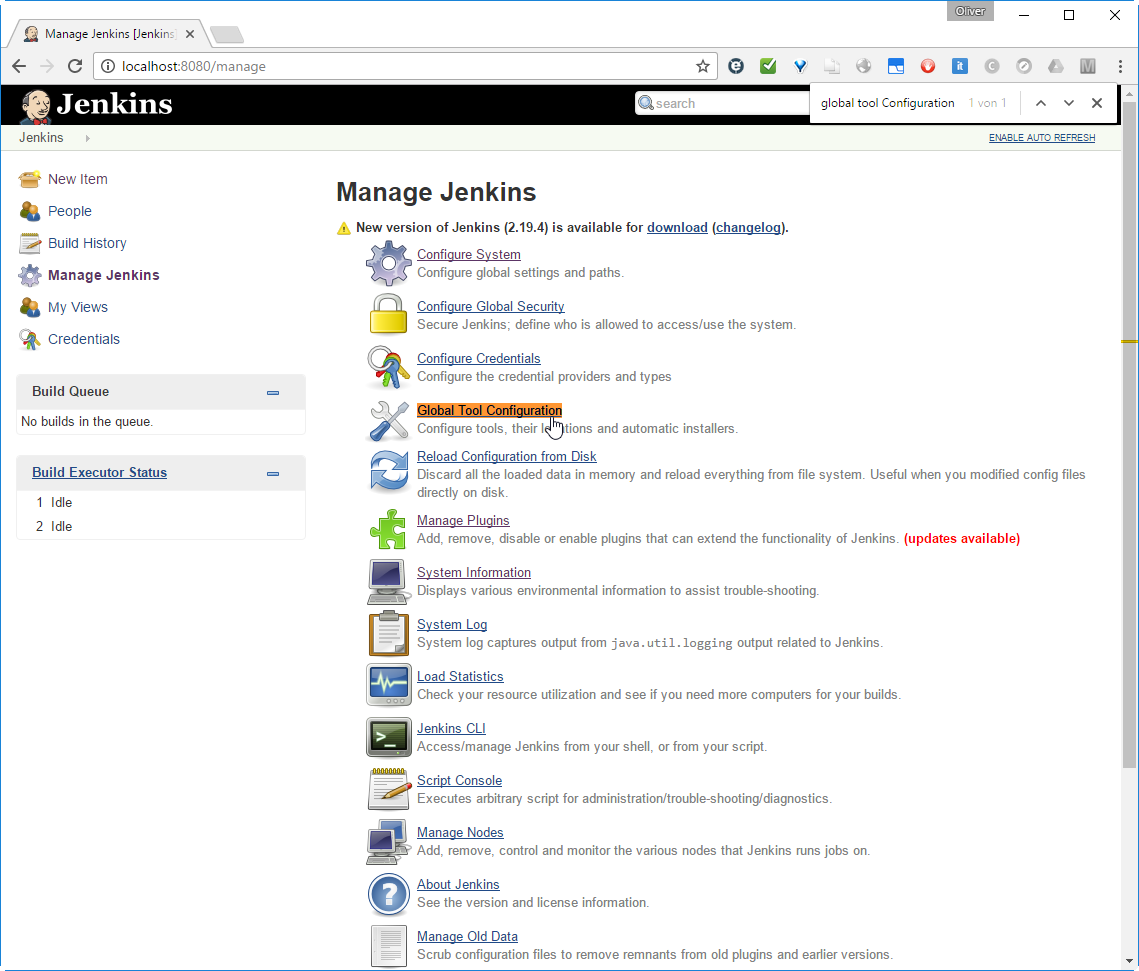
-> choose Version (3.3.9 in my case)

-> Add a name („Maven 3.3.9“ in my case)

Since we have checked „Install automatically“ above, I expect that it will be installed automatically on first usage.

Step 6: Prepare Git Usage

-> scroll down to „Git plugin“

->

Step 7: Create Jenkins Job from Code

Step 7.1 Build Project

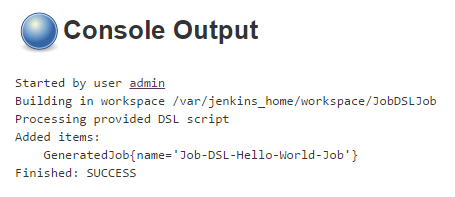
Step 7.2 (optional): Check Console Output

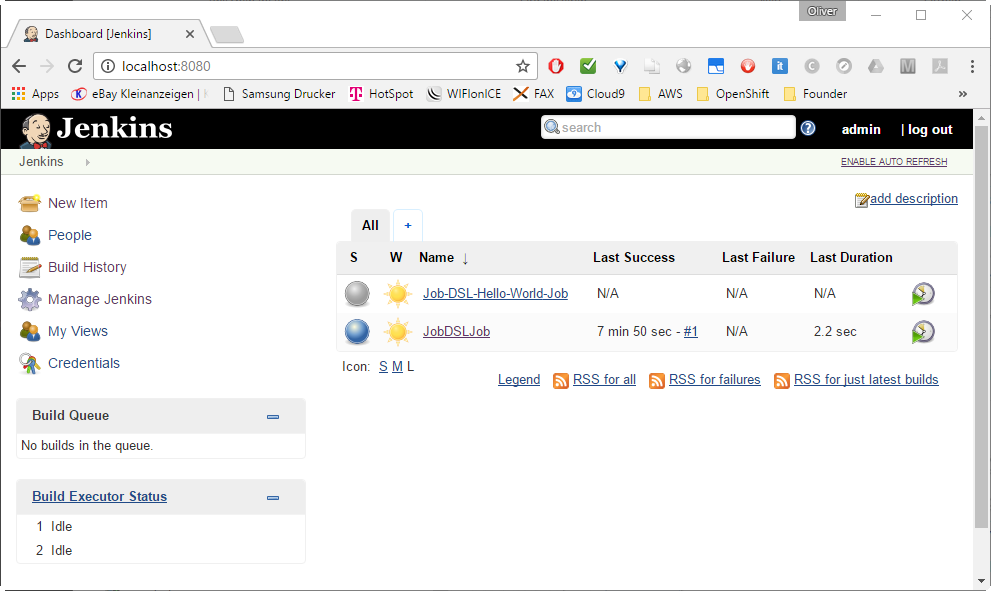
Step 7.3: Review automatically built Project

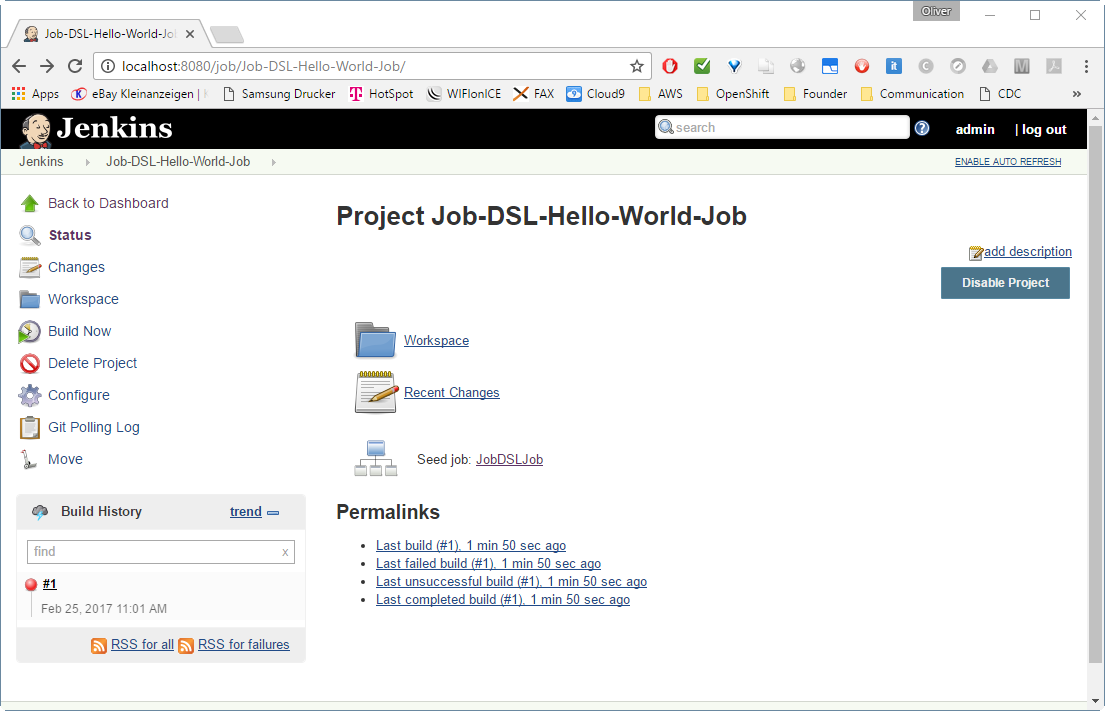
This is showing a build failure, since I had not performed Step 5 and 6 before. In your case, it should be showing a success (in blue). If you are experiencing problems here, check out the Appendices below.

-> scroll down to Source Code Management
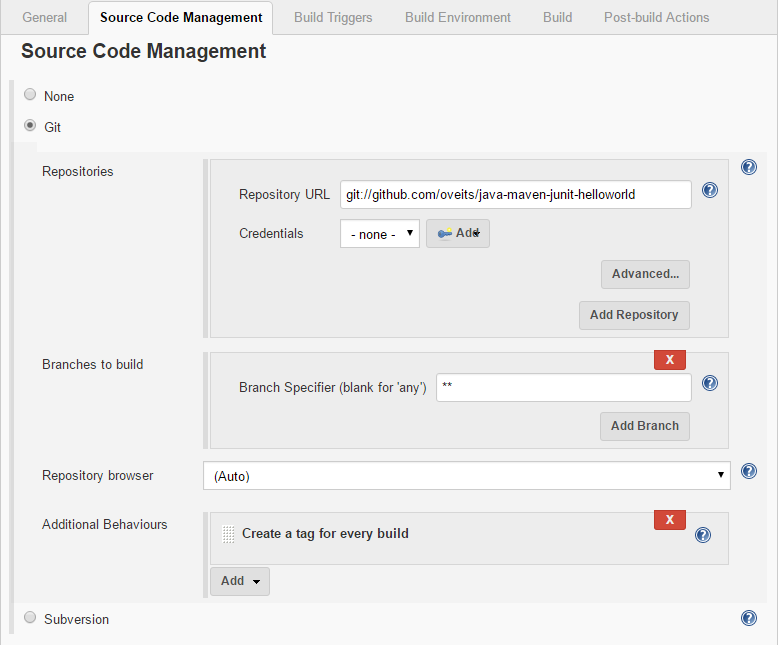
-> Scroll down to Build Triggers
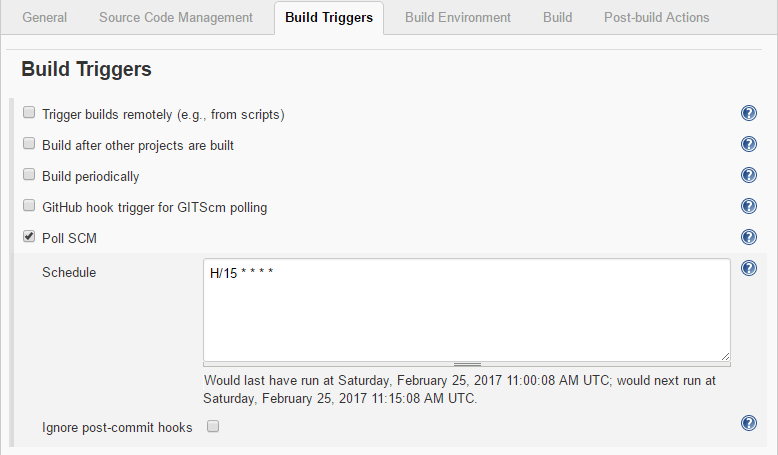
-> Scroll down to Build

-> verify that „Maven 3.3.9“ is chosen as defined in Step 5

-> enter „-e clean test“ as Maven Goal
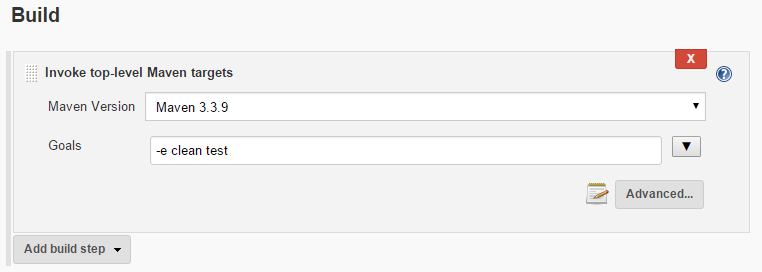
See, what happens by clicking on:

-> Build History

-> #nnn

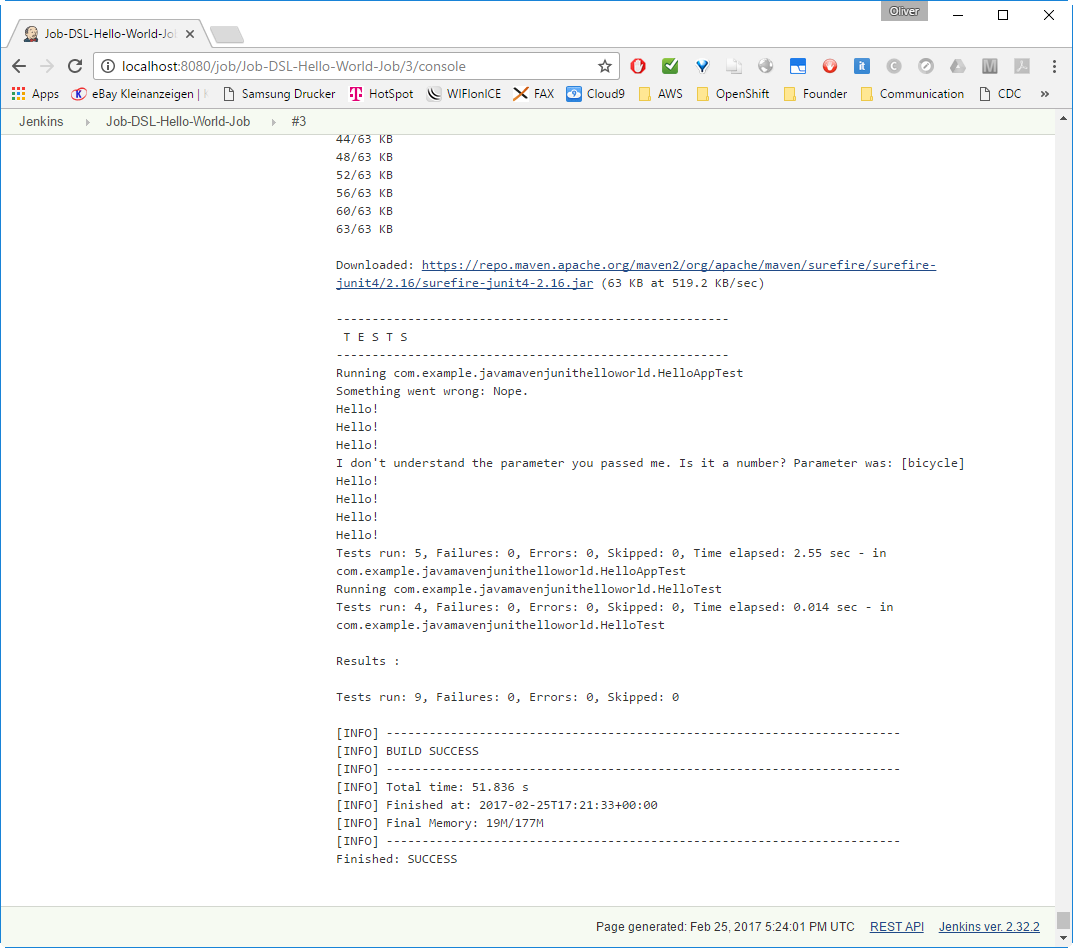
If everything went fine, we will see many downloads and a „BUILD SUCCESS“:
Appendix A: Solve Git Problem: „tell me who you are“

Symptoms: Git Error: status code 128

In a new installation of Jenkins, Git does not seem to work out of the box. You can see this by choosing the Jenkins project Job-DSL-Hello-World-Job on the dashboard, then click „build now“, if the build was not already automatically triggered. Then:

-> Build History

There, we will see:

Caused by: hudson.plugins.git.GitException: Command "git tag -a -f -m Jenkins Build #1 jenkins-Job-DSL-Hello-World-Job-1" returned status code 128:
stdout: 
stderr: 
*** Please tell me who you are.

Run

  git config --global user.email "you@example.com"
  git config --global user.name "Your Name"

to set your account's default identity.
Omit --global to set the identity only in this repository.

fatal: empty ident name (for <jenkins@61915398735e.(none)>) not allowed

Resolution:

Step 1: Enter Git Username and Email

-> scroll down to „Git plugin“

Step 2: Re-run „Build Now“ on the Project

To test the new configuration, we go to

Now, we should see a BUILD SUCCESS like follows:

-> Build History

-> #nnn

If everything went fine, we will a „BUILD SUCCESS“:

Appendix B: Maven Error: Cannot run program „mvn“

Symptoms:

When running a Maven Goal, the following error may appear on the Console log:

FATAL: command execution failed
java.io.IOException: Cannot run program "mvn" (in directory "/var/jenkins_home/workspace/Job-DSL-Hello-World-Job"): error=2, No such file or directory
	at java.lang.ProcessBuilder.start(ProcessBuilder.java:1048)
	at hudson.Proc$LocalProc.(Proc.java:245)
	at hudson.Proc$LocalProc.(Proc.java:214)
	at hudson.Launcher$LocalLauncher.launch(Launcher.java:846)
	at hudson.Launcher$ProcStarter.start(Launcher.java:384)
	at hudson.Launcher$ProcStarter.join(Launcher.java:395)
	at hudson.tasks.Maven.perform(Maven.java:367)
	at hudson.tasks.BuildStepMonitor$1.perform(BuildStepMonitor.java:20)
	at hudson.model.AbstractBuild$AbstractBuildExecution.perform(AbstractBuild.java:779)
	at hudson.model.Build$BuildExecution.build(Build.java:205)
	at hudson.model.Build$BuildExecution.doRun(Build.java:162)
	at hudson.model.AbstractBuild$AbstractBuildExecution.run(AbstractBuild.java:534)
	at hudson.model.Run.execute(Run.java:1728)
	at hudson.model.FreeStyleBuild.run(FreeStyleBuild.java:43)
	at hudson.model.ResourceController.execute(ResourceController.java:98)
	at hudson.model.Executor.run(Executor.java:404)
Caused by: java.io.IOException: error=2, No such file or directory
	at java.lang.UNIXProcess.forkAndExec(Native Method)
	at java.lang.UNIXProcess.(UNIXProcess.java:247)
	at java.lang.ProcessImpl.start(ProcessImpl.java:134)
	at java.lang.ProcessBuilder.start(ProcessBuilder.java:1029)
	... 15 more
Build step 'Invoke top-level Maven targets' marked build as failure
Finished: FAILURE

Resolution:

Perform Step 5

and

For Test, you can test a manual: choose the correct Maven version, when configuring a Maven build step like in Step 7:

For our case, we need to correct the Job DSL like follows:

In the Script, we had defined the step:

    steps {
        maven('-e clean test')
    }

However, we need to define the Maven Installation like follows:

    steps {
        maven {
            mavenInstallation("Maven 3.3.9")
            goals('-e clean test')
        }
    }

Here, the mavenInstallation needs to specify the exact same name, as the one we have chosen in Step 5 above.

After correction, we will receive the correct Maven goal

Now, we can check the Maven configuration:

After scrolling down, we will see the correct Maven Version:

DONE

Appendix C: Updating Jenkins

Updating Jenkins (in my case: from 2.32.1 to 2.32.2) was as simple as following the steps below

Note: you might want to make a backup of your jenkins_home though. Just in case…

(dockerhost)$ cd <path_to_jenkins_home> # in my case: cd /user/jenkins_home/
(dockerhost)$ docker pull jenkins # to update the jenkins image
(dockerhost)$ docker rm jenkins # to make shure the container named jenkins is removed
(dockerhost:jenkins_home)$ sudo docker run -d --rm --name jenkins -p8080:8080 -p50000:50000 -v`pwd`:/var/jenkins_home jenkins

However, after that, some data was unreadable:

I have clicked

to resolve the issue (hopefully…). At least, after that, the warning was gone.

Appendix D: Job DSL Syntax

> freeStyleJob > steps > maven:

maven {
  • // Allows direct manipulation of the generated XML.

  • // Specifies the goals to execute including other command line options.

  • // Skip injecting build variables as properties into the Maven process.

  • // Set to use isolated local Maven repositories.

  • // Specifies the Maven installation for executing this step.

  • // Specifies the JVM options needed when launching Maven as an external process.

  • // Adds properties for the Maven build.

  • // Adds a property for the Maven build.

  • // Specifies the managed global Maven settings to be used.

  • // Specifies the managed Maven settings to be used.

  • // Specifies the path to the root POM.

}

A Maven example can be found on the same page:

job('example') {
    steps {
        maven('verify')
        maven('clean verify', 'module-a/pom.xml')
        maven {
            goals('clean')
            goals('verify')
            mavenOpts('-Xms256m')
            mavenOpts('-Xmx512m')
            localRepository(LocalRepositoryLocation.LOCAL_TO_WORKSPACE)
            properties(skipTests: true)
            mavenInstallation('Maven 3.1.1')
            providedSettings('central-mirror')
        }
    }
}

Summary

In this blog post, we have learned how to

  1. Start and initialize Jenkins via Docker

  2. Prepare the usage of Git and Maven

  3. Install the Job DSL Plugin

  4. Define a Jenkins Job via Groovy script

  5. Create a Jenkins Job by a push of the „Build now“ button

  6. Review and run the automatically created Jenkins job

We have seen that the usage of the Job DSL is no rocket science. The only topic, we had to take care, is, that Git and Maven need to be prepared for first usage on a Jenkins server.

\

PreviousDatabase Dump - PlaygroundNextGitOps

Last updated 2 months ago

Was this helpful?

We will run Jenkins in a container to allow for maximum interoperability. This way, we always can use the latest Jenkins version without the need to control the Java version used.

If you are new to Docker, you might want to read .

Note: The content of the jenkins image can be reviewed on . There, we find that the image has an entrypoint /bin/tini -- /usr/local/bin/jenkins.sh, which we could override with the --entrypoint bash option, if we wanted to start a bash shell in the jenkins image. However, in Step 3, we will keep the entrypoint for now.

Note: The content of the jenkins image can be reviewed on . There, we find that the image has an entrypoint /bin/tini -- /usr/local/bin/jenkins.sh, which we could override with the --entrypoint bash option, if we wanted to start a bash shell in the jenkins image.

2016-11-30-19_36_42-jenkins-jenkins

The can be installed like any other Jenkins plugin:

-> -> ->

-> (with dash between job and dsl; wait for the filter to become active and do not press enter, otherwise you will get an error message)

->

->

->

->

->

-> if you have got a account, fork (originally created by of ) that will allow you to see, what happens with your Jenkins job, if you check in changed code. Moreover the hello world software allows you to perform tests, run Mock services, run JUnit 4 Integration tests and calculate the code coverage using the tool .

->

here, exchange the username oveits by your own username.\

->

Scroll down to Maven ->

->

As described in , we need to add the Git username and email address, since Jenkins tries to tag and commit on the Git repo, which requires those configuration items to be set. For that, we perform:

->

->

->

->

->

->

->

->

->

->

->

->

-> (link works only, if Jenkins is running on localhost:8080 and you have chosen the same job name)

->

As described in : we can resolve this issue by either suppressing the git tagging, or (I think this is better) by adding your username and email address to git:

->

->

->

->

-> the and press

->

->

and verify that does not throw the Maven error anymore.

-> JobDSL ->

->

->

->

-> Manage Jenkins -> Manage ->

The reference for the Job DSL syntax can be found on the . As an example, the syntax of Maven within a Freestyle project can be found on found via the path

(Closure configureBlock)

(String goals)

(boolean injectBuildVariables = true)

(javaposse.jobdsl.dsl.helpers.LocalRepositoryLocation location)

(String name)

(String mavenOpts)

(Map props)

(String key, String value)

(String settingsIdOrName)

(String settingsIdOrName)

(String rootPOM)

📓
Docker
this blog post
this link
this link
Job DSL Plugin
Github
this open source Java Hello World software
LableOrg
JUnit 4
PowerMockito
Cobertura
Github
this StackOverflow Q&A
Last Build
this StackOverflow Q&A
Job-DSL-Hello-World-Job
Job DSL Plugin API pages
this page
configure
goals
injectBuildVariables
localRepository
mavenInstallation
mavenOpts
properties
property
providedGlobalSettings
providedSettings
rootPOM